

T-shirt Pillow Covers

Why leave those souvenir t-shirts in the closet? Follow along for these easy steps to make cute, colorful & of course comfortable pillow covers out of t-shirts!

By the time my son graduated from college, he had an enormous collection of t-shirts! Being the sappy sentiment I am, I hated giving ALL of them away!
I came up with this idea as a fun way to have some of my son’s college story on my family room couch! And, for once I didn’t embarrass him because he actually liked the finished project!

Step 1: Gather all the things…. I used my portable PFAFF hobby 1016 sewing machine, yard stick, scissors, chalk, straight pins, velcro strips & seam ripper - just in case of a do over here or there!

Step 2: Working on a flat surface, smooth the t-shirt out. Use the yard stick (or any straight edge) & a piece of chalk to draw line at the sleeves. Cut along the line to remove the sleeves. I tried to leave the sleeves on the shirt but it made the pillow cover too bulky in the corners. Now, turn the t-shirt wrong side out.

Step 3: With the t-shirt turned wrong side out, draw a chalk line across the entire front of the t-shirt (from sleeve to sleeve) just under the neck hole.

Step 4: Use straight pins to keep the sides straight and place the foot of the sewing machine on the chalk line that was just drawn across the t-shirt. Sewing the seam here will create a straight edge where the neck used to be.

This is the medium length stitch I used for my t-shirt pillow covers.
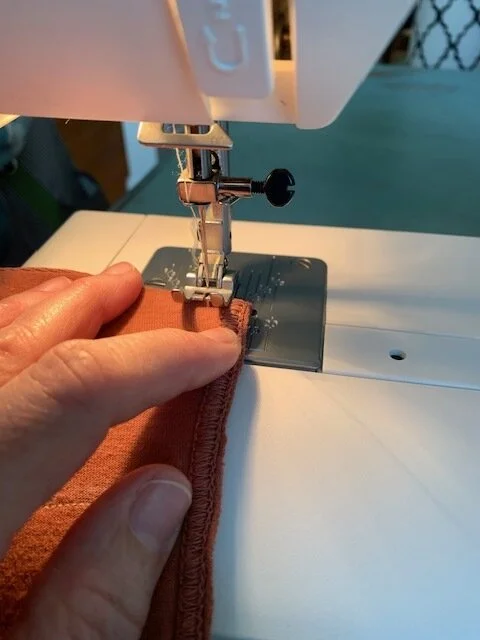
Step 4: Pinning the edge of the fabric together to prevent the two layers from sliding as you sew, place the foot of your machine at the edge where the arm holes are and start your seam.
This will create the other two sides of the pillow cover.

As you are sewing the seams to close up the arm holes, you will need to progressively angle the stitching line to come in even with the body of the shirt where the sleeves used to be.

Step 5: Across the bottom of the t-shirt I used small little circles of Velcro to use keep the cover closed once it is on the pillow. I set the needle on the Velcro & made a couple of stitches & then did a reverse stitch to secure it.

I also had some strips of Velcro on hand & tried these as well on a couple of the pillow covers.
I liked both types of Velcro.

After sewing the neck & the arm holes closed, here is the square with the bottom of the t-shirt open to pull over the pillow.

This is the pillow I covered. I bought it at Ikea. This is one of their feather pillow fillers & one of their black & white pillow covers. The t-shirts I used were size Men’s medium & the pillows from Ikea are 20”x20”. The fit was perfect.

Here’s the finished t-shirt pillow cover over the Ikea black & white pillow I just showed you in the picture above.

I love the little pockets on the pillows too! You might be able to pop the remote in there for safe keeping!

This is what I started with… I love me some black & white…. don’t get me wrong but once I slip covered my ottoman for spring the color scheme & patterns weren’t getting along at all!

So here’s what my sofa & ottoman in my family room looks like for Spring & Summer! I love the colors & actually use the back of the t-shirt as the front of my pillows. There is a lot more color & interest on the backs of these particular t-shirts.
I used an oblong/rectangular tablecloth I found on clearance at Walmart as my slip cover…. using the same method from my earlier post of sewing a slip cover. I’m not a big floral person but I loved these colors & they really popped with the Annie Sloane Yellow chalk painted side board that lives below the tv.
I was truly amazed at how the colors all came together because I didn’t plan it that way!

Just had to add this picture! My hubby & son bought me these roses for Mother’s Day & the colors were perfect! It’s like they popped right off the ottoman into a bouquet just for me!

Just one more shot!
I hope you enjoyed today’s post & try making these super easy pillow covers soon!
Enjoy being creative!
Rhonda